The full guide for creating custom WordPress plugins with PHP.
WordPress is the most used content management system on the planet. So today we’re taking a closer look at how to create custom plugins to extend the functionality of WordPress.
Why Create a Custom Plugin?
WordPress has many features already built-in to build and customize your website, and with the Gutenberg Project WordPress is transforming the way you share content on the web.
However, if you want to customize or extend core functionality (and not only the design) you can use plugins to do just that. There’s a good change the WordPress plugin directory already has a plugin for your use-case, but if not, you have to build your own.
Table of Contents
Setting up WordPress and a local development environment
Before we can create a plugin for WordPress, we need to have a working WordPress website. To follow along, you don’t need to have this website hosted somewhere - all you need is a webserver with PHP and a MySQL database running on your local computer.
Windows
- Download and install XAMPP for Windows
- Start XAMPP and start Apache and MySQL
- Open http://localhost and verify that everything works
The root-directory of your webserver is located here:
C:/xampp/htdocsPhpMyAdmin is available at http://localhost/phpMyAdmin to manage your databases (username root, no password).
The URL of your local webserver is http://localhost.
macOS
- Download and install MAMP for macOS
- Start MAMP and click on “Preferences”
- Under “Ports”, make sure the Apache port is 80
- Open http://localhost and verify that everything works
The root-directory of your webserver is located here:
/Applications/MAMP/htdocsPhpMyAdmin is available at http://localhost/phpMyAdmin to manage your databases (username root, password root).
The URL of your local webserver is http://localhost.
Setting up WordPress
Create a new folder in your root-directory (see above) for your new WordPress installation. I’ll call it custom-wp-plugin which means my WordPress website will be available at http://localhost/custom-wp-plugin. You can also use a different name don’t use a separate folder at all.
Next, head over to wordpress.org to download the latest WordPress version. Extract the downloaded zip-archive to the new folder (previous step).
We also need a database, so open up phpMyAdmin and create a new database. To keep it organized, I’ll call it just like the folder of my WordPress installation, custom-wp-plugin.
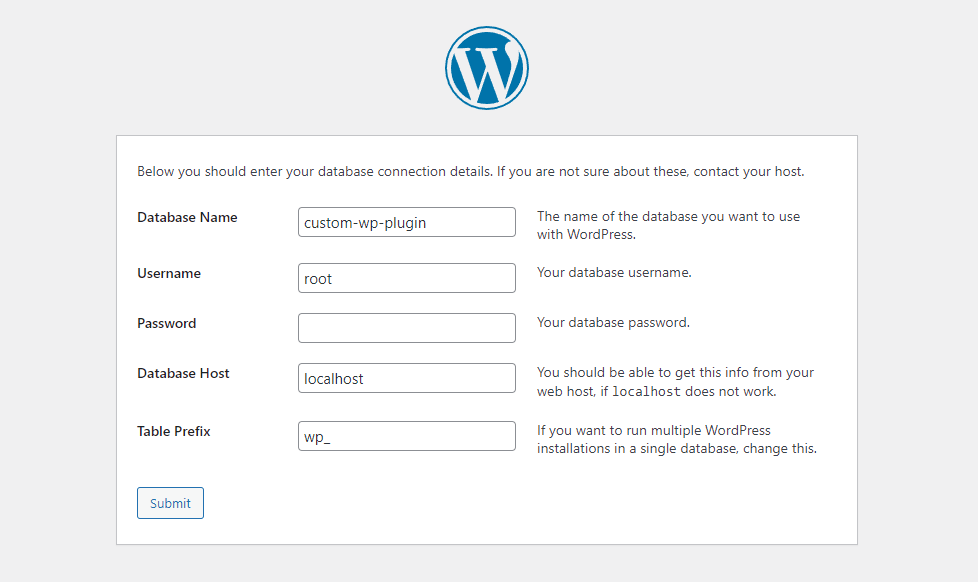
Now the installation and database are ready, open the website in your browser (for me that’s http://localhost/custom-wp-plugin).
Select your language, enter your database credentials and hit “Run the installation”.
After the database setup, you’ll be prompted to setup your new website. Since this website is just running on my computer and only used to test the plugin, I use admin as username and password. If you want to use this in production on a server, make sure to use secure credentials.
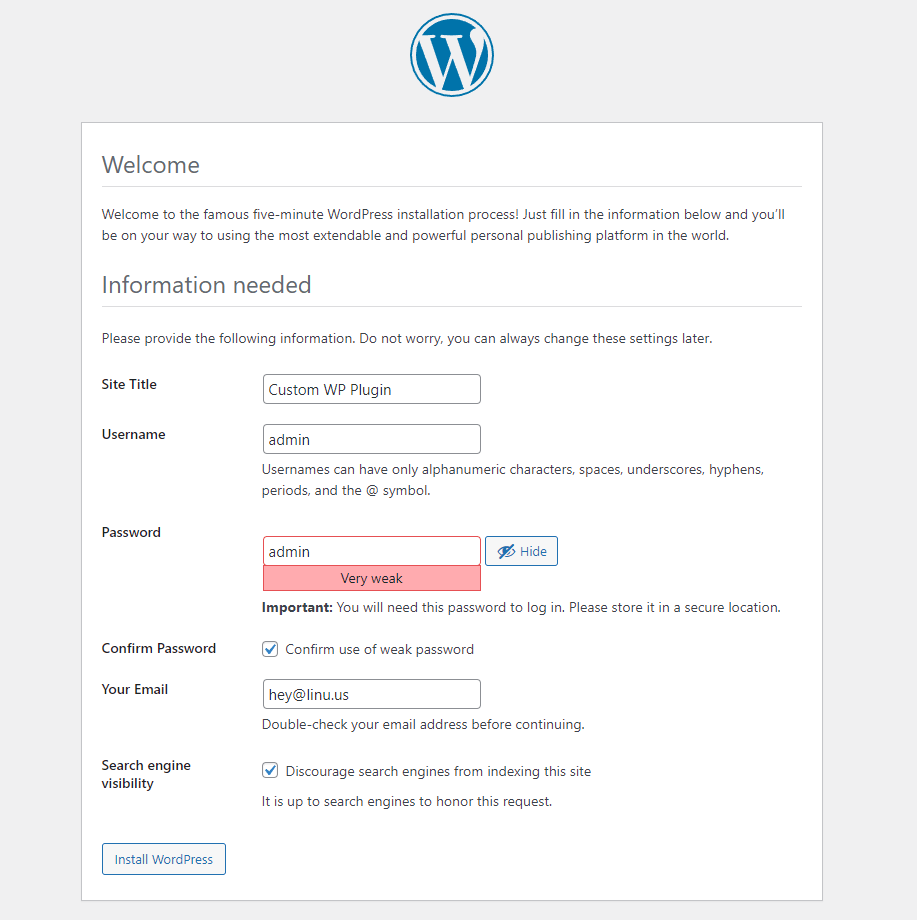
Now hit “Install WordPress” and then “Log In” and login with the account you just created (admin & admin in my case).
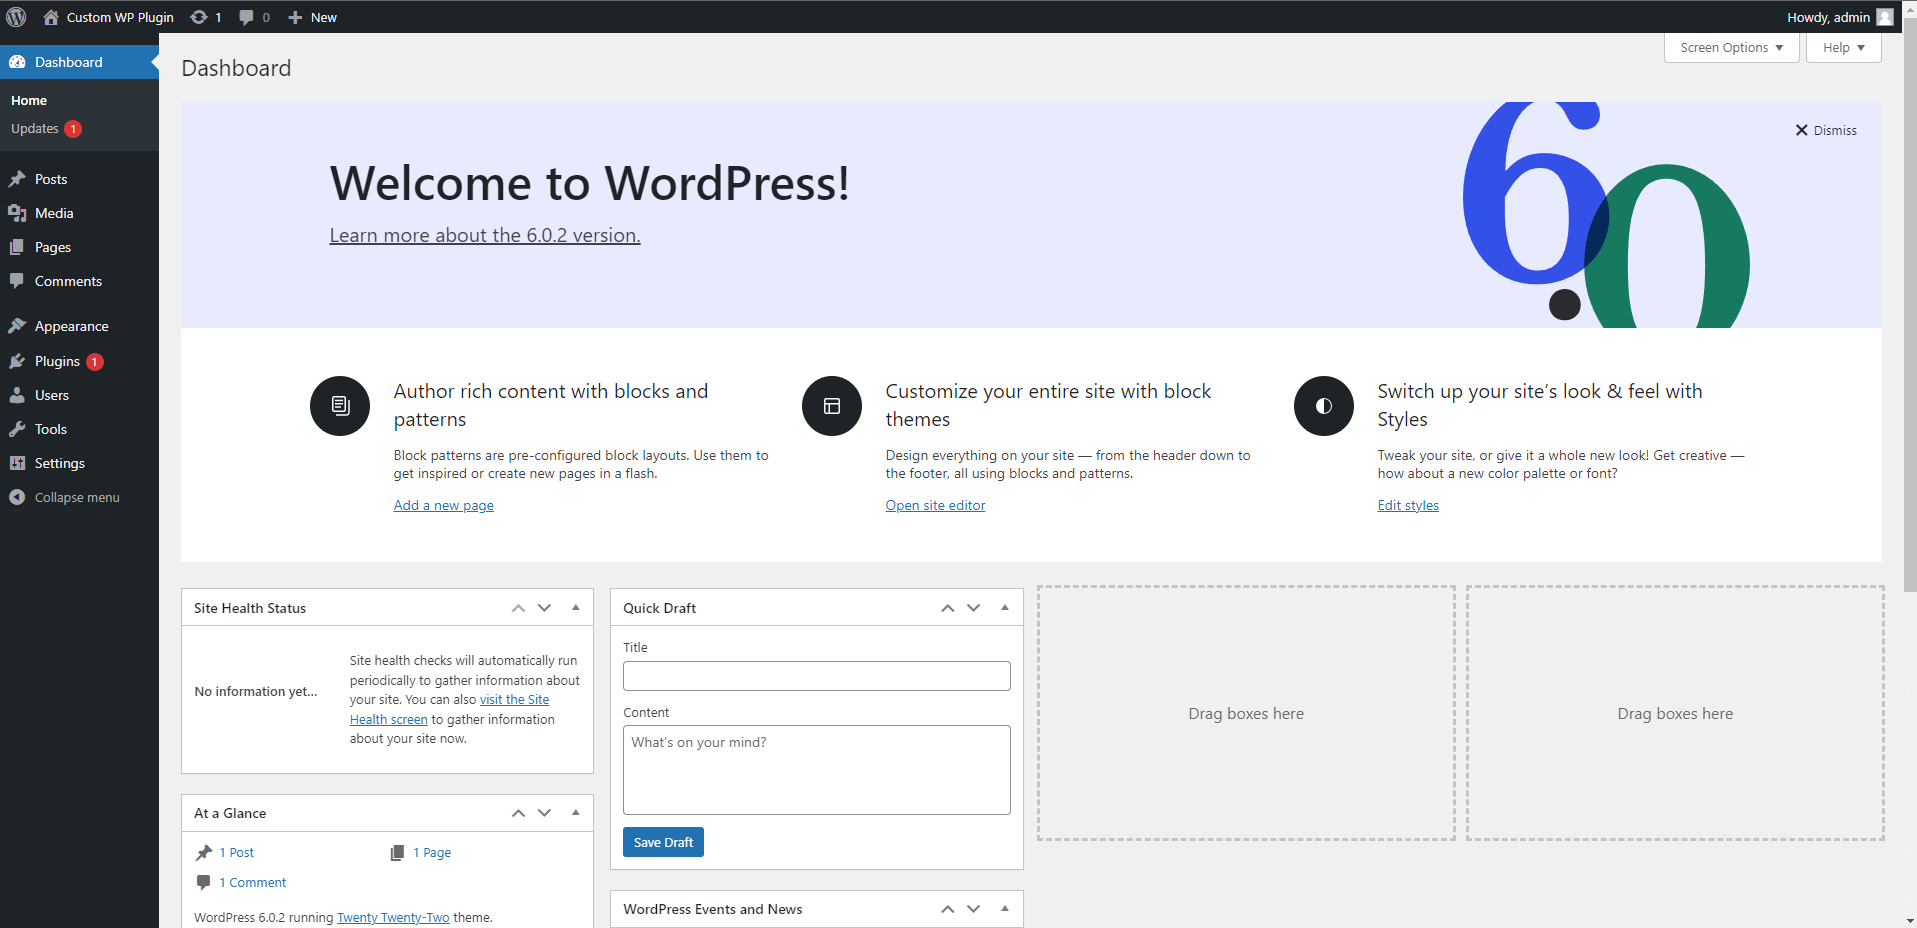
WordPress is now installed and ready to use!
Creating the Foundation
WordPress stores customizations and content in different locations:
- Uploads (images, videos, …):
<root-folder>/wp-content/uploads - Themes:
<root-folder>/wp-content/themes - Plugins:
<root-folder>/wp-content/plugins - Data (pages, settings, articles, …): MySQL Database
In the plugins directory, each plugin has its own folder. So, let’s create one:
<root-folder>/wp-content/plugins/example-pluginThis folder will contain all the files needed for the plugin. And if you want to share the plugin with others, you can just put it in a zip-archive and upload it to another WordPress website.
Now open this folder using your favorite IDE or editor (like PhpStorm or Visual Studio Code). By the way, if you’re using Vim or NeoVim, I have written a full article on how to set it up for PHP (and WordPress) development.
Create the main file
The main file of any WordPress plugin is the PHP file with the same name as the plugin folder, in this case example-plugin. That means we have to create a new file called example-plugin.php in our plugin’s directory.
To get our plugin shown in the WordPress plugin manager, we have to add a comment to the top of the file with some information about the plugin:
<?php

/**
 * Plugin Name: Example Plugin
 * Version: 1.1
 */
You can also add more details if you want:
<?php

/**
 * Plugin Name: Example Plugin
 * Version: 1.1
 * Author: Linus Benkner
 * Author URI: https://blog.linu.us
 * Plugin URI: https://example-plugin.com
 * Description: A custom WordPress Plugin
 */
Activate the Plugin
Head over to your WordPress Dashboard and go to “Plugins”. You should see the plugin listed:
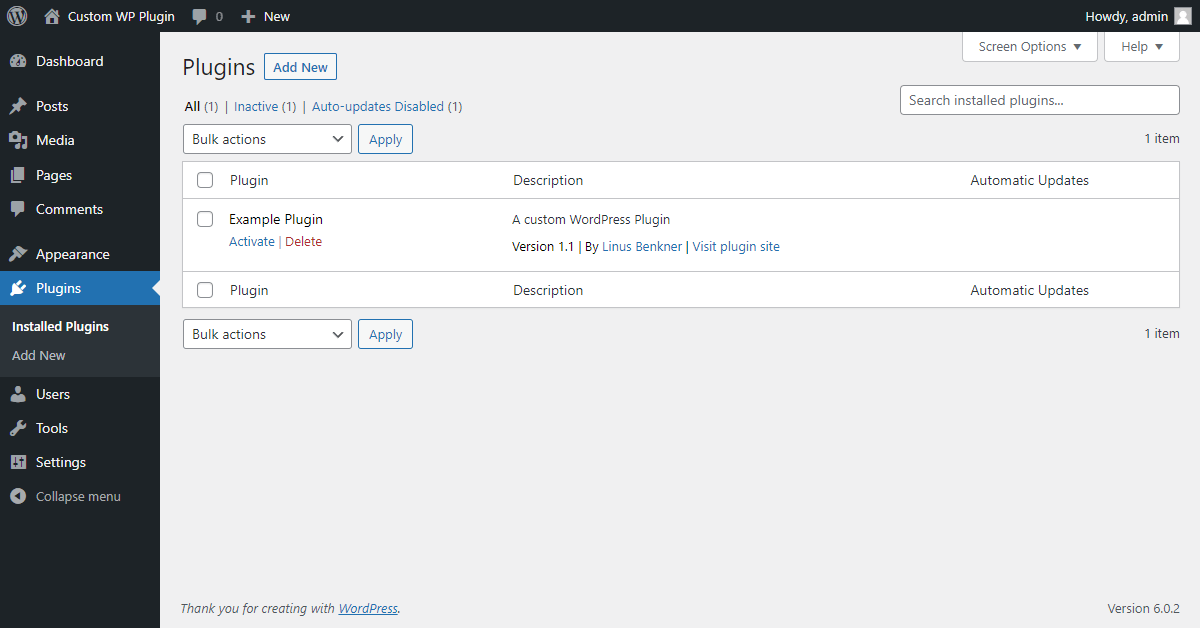
(I have deleted the default plugins “Akismet Anti-Spam” and “Hello Dolly”. You probably see these plugins listed there as well.)
You can now activate the plugin by clicking “Activate”.
Hey 👋 Don't want to miss new articles?
Drop your mail and I'll notify you if I have something new!
Understanding Actions and Filters
Before we customize WordPress, it’s important to understand how this even works. In WordPress, nearly everything can be customized using actions and filters.
Actions
An action is a function that can be triggered somewhere else. For example:
// Listen to an action
function sayHello() {
	echo "Hello world!";
}
add_action("say_hello", "sayHello");

// Trigger an action
do_action("say_hello");
The do_action function can also pass data to all the listening functions:
// Listen to an action
function sayHello($name) {
	echo "Hello " . $name;
}
add_action("say_hello", "sayHello");

// Trigger an action
do_action("say_hello", "Linus");
It is also possible to remove actions:
// Listen to an action
function sayHello($name) {
	echo "Hello " . $name;
}
add_action("say_hello", "sayHello");

// Remove it
remove_action("say_hello", "sayHello");

// Trigger an action
do_action("say_hello", "Linus");
Now, obviously it doesn’t make much sense to create an action and then immediately remove it. Most often, remove_action is used to remove actions someone else created, for example WordPress itself.
Filters
Filters are pretty similar to actions, but with the key difference that they return a value:
// Create a filter
function applyTaxes($price) {
	return $price * 1.19;
}
add_filter("final_price", "applyTaxes");

// Filter something
$price = apply_filters("final_price", 100);
echo $price; // 119
When you have multiple filters, you can order them using a number as third argument. For example, we want to first reduce the price by 30 and then add taxes:
// Create a filter
function applyTaxes($price) {
	return $price * 1.19;
}
add_filter("final_price", "applyTaxes", 2); // <- Priority: 2

// Create a second filter
function applySpecialOfferSale($price) {
	return $price - 30;
}
add_filter("final_price", "applySpecialOfferSale", 1); // <- Priority: 1

// Filter something
$price = apply_filters("final_price", 100);
echo $price; // 83.3
Actions can be prioritized the same way.
Adding a Widget to the WordPress Dashboard
In our main plugin file, let’s listen to the following action: wp_dashboard_setup. That’s an action by WordPress, executed when the Dashboard is requested:
function create_custom_dashboard_widget() {
	// Todo
}
add_action("wp_dashboard_setup", "create_custom_dashboard_widget");
Inside this function, we can register a new Widget to the Dashboard using the wp_add_dashboard_widget function:
function create_custom_dashboard_widget() {
wp_add_dashboard_widget(
"example_plugin_widget", // Widget ID
"Example Plugin Widget", // Widget Name
"render_example_plugin_widget" // Callback function
);
}
add_action("wp_dashboard_setup", "create_custom_dashboard_widget");
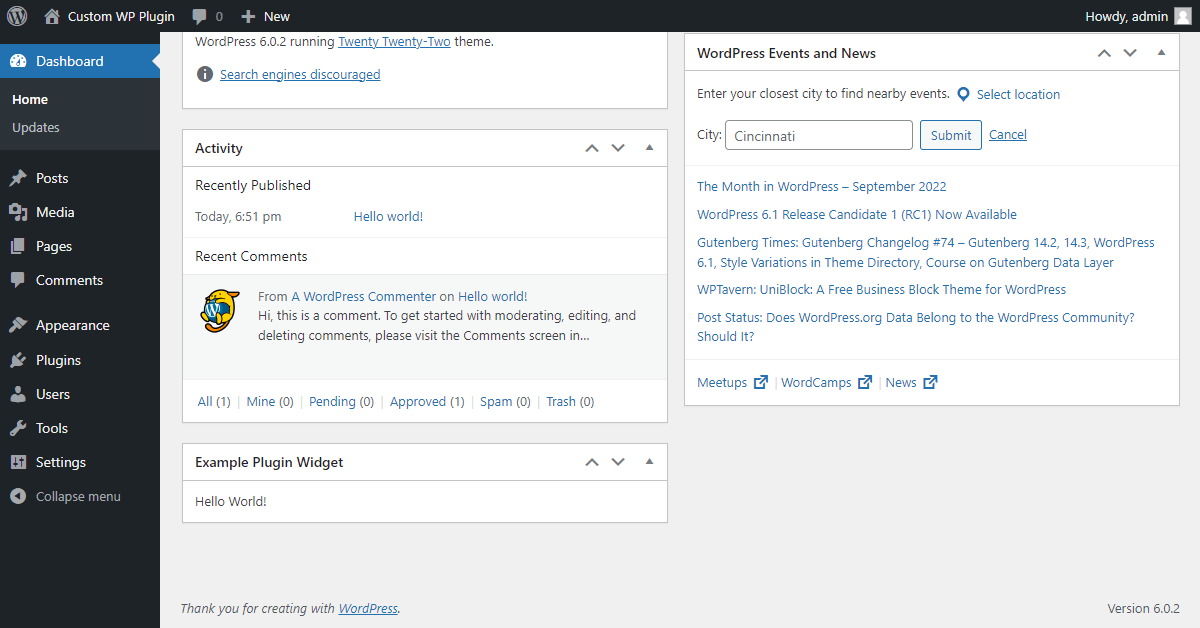
function render_example_plugin_widget() {
echo "Hello World!";
}In your WordPress Dashboard, you should see the new Widget:
Add Custom Content to Pages
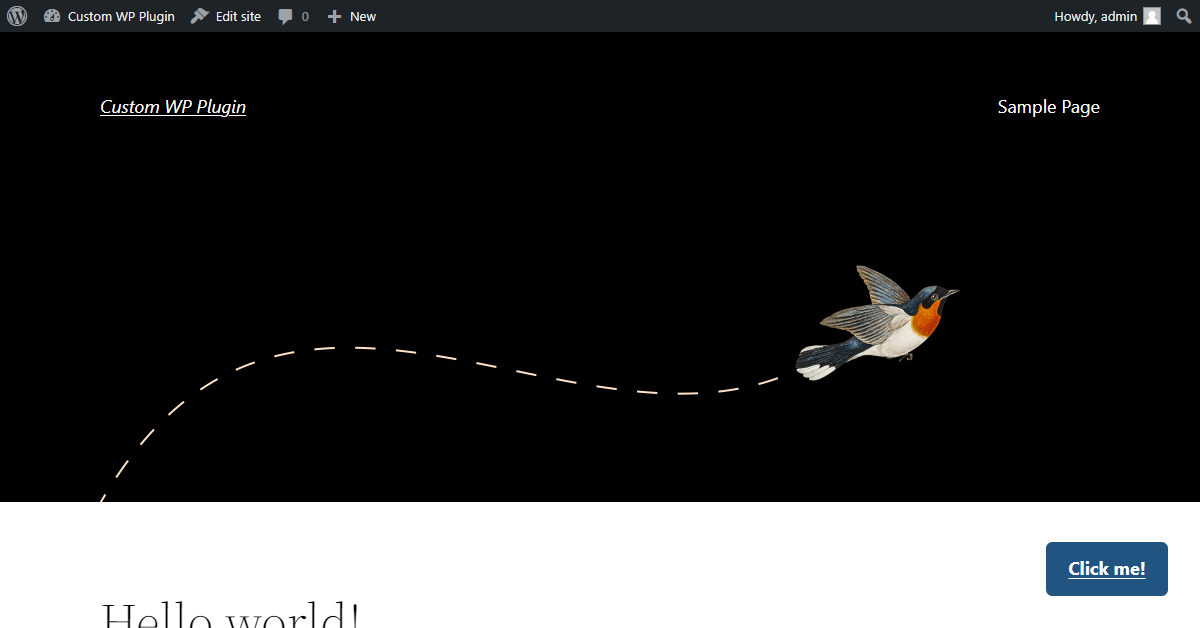
Let’s shift gears to the actual content of a website. For this example, we’ll add a floating link to each page.
Append HTML to the Content
To build a floating link, we need to add some HTML to the page. And you might have guessed it, there is an action to do just that. So, we can use the wp_footer action to echo some HTML that will be printed at the bottom of the page:
function append_floating_link() {
	echo "<a href='https://blog.linu.us' id='floating-link'>Click me!</a>";
}
add_action("wp_footer", "append_floating_link");
On the home page, there is now a link at the bottom of the page.
Register Stylesheets
Our link is not “floating” yet, we need some CSS to make that happen. Create a new CSS file called style.css and add some styling:
#floating-link {
  position: fixed;
  bottom: 2rem;
  right: 2rem;
  background-color: #225482;
  color: white;
  font-weight: bold;
  padding: 0.8rem 1.4rem;
  border-radius: 0.4rem;
}
Now we can enqueue the stylesheet inside the wp_enqueue_scripts action:
function register_plugin_styles() {
	$plugin_url = plugin_dir_url(__FILE__); // <website_url>/wp-content/plugins/<plugin_name>/
	wp_enqueue_style("custom_plugin_style", $plugin_url . "style.css");
}
add_action("wp_enqueue_scripts", "register_plugin_styles");
On the page, you should now see a blue button:
Register JavaScript
You might also need custom JavaScript on the page, so let’s add some as well. For example, we can ask the user if they really want to leave the page when they click on the button. We can do this by selecting the link by the ID, add a event listener and cancel the “click” event if window.prompt returns false (the user denied). Create a new script script.js:
const floatingLink = document.getElementById("floating-link");

floatingLink.addEventListener("click", function (event) {
  if (window.confirm("Are you sure?")) {
    // Do nothing
  } else {
    event.preventDefault();
  }
});We can add a script like we add a stylesheet:
function register_plugin_styles() {
	$plugin_url = plugin_dir_url(__FILE__); // <website_url>/wp-content/plugins/<plugin_name>/
	wp_enqueue_style("custom_plugin_style", $plugin_url . "style.css");

	// Register the script:
	wp_enqueue_script("custom_plugin_script", $plugin_url . "script.js", [], false, true);
}
add_action("wp_enqueue_scripts", "register_plugin_styles");
Note: I’ve added 3 more arguments [], false, true:
[]: Dependencies - not needed, that’s the default valuefalse: Version - not needed, that’s the default valuetrue: Load script in footer - this has to be true because if the script is loaded in the head of the document, we can’t directly access the link (because the script is loaded before the content is ready)
If you refresh the page and then click on the link, your browser will ask you if you really want to quit. With that, we now have added custom HTML, CSS and JavaScript to the page!
Creating a Settings Page
Settings pages are a great way to give certain WordPress users (administrators, editors, …) an option to customize the behavior of your plugin and / or display data.
Let’s build a settings page to customize the URL and text of our floating link.
How Options Work
WordPress has an extra database table just for settings like URL, theme, site name, and more. These options can be accessed using the get_option function:
$websiteName = get_option("blogname"); // Custom WP Plugin
$websiteURL = get_option("siteurl"); // http://localhost/custom-wp-plugin
The cool thing about this is, we’re able to add our own options to the table with the add_option function:
add_option(
	"example_plugin_button_url", // name of the option
	"https://google.com" // default value
);
Now, whenever we need to get the current value of the option, we can just use get_option:
$buttonURL = get_option("example_plugin_button_url");
echo $buttonURL; // https://google.com
And if we want to update the value, there is a function called update_option:
update_option("example_plugin_button_url", "https://blog.linu.us");

$buttonURL = get_option("example_plugin_button_url");
echo $buttonURL; // https://blog.linu.us
Creating the Settings Page
A settings page is a separate page in the WordPress Dashboard that’s only visible to users with a certain capability (e.g., only to administrators or editors).
How the Settings Page is Structured
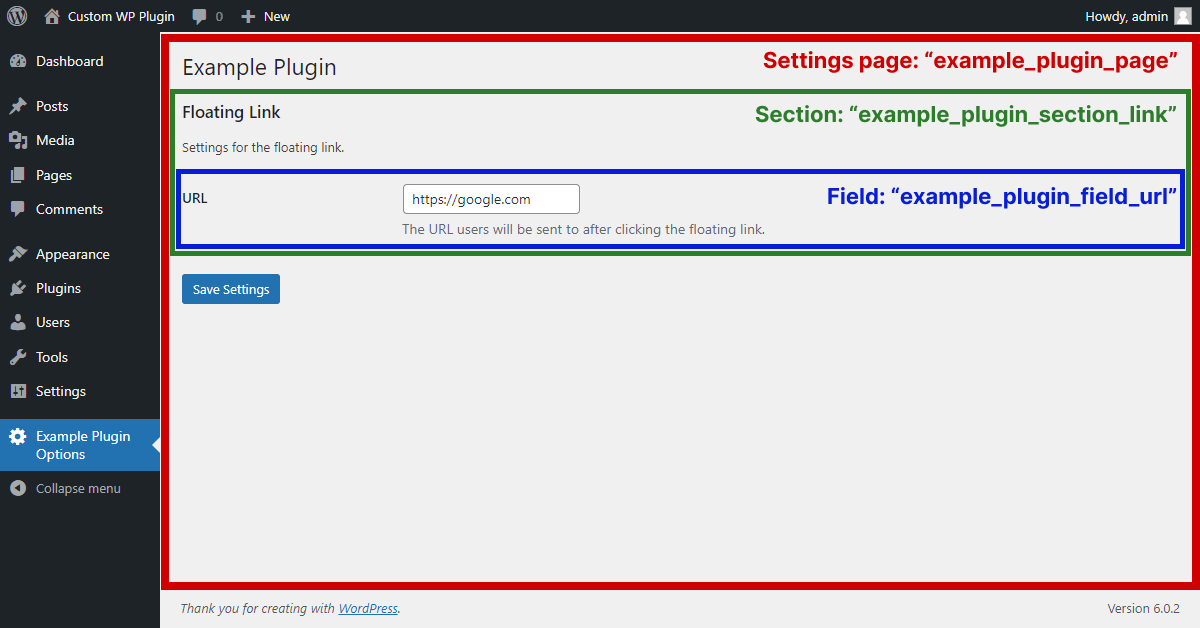
Creating the Settings Page
First, we need the page itself. We start by registering a new menu page:
// Add the page to the menu
function example_plugin_options_page() {
	add_menu_page(
		'Example Plugin', // page title
		'Example Plugin Options', // menu title
		'manage_options', // required capability / permission
		'example_plugin_page', // slug
		'example_plugin_options_html' // callback function
	);
}
add_action('admin_menu', 'example_plugin_options_page');
Whenever the page is requested (by clicking the link in the menu), the callback function example_plugin_options_html will output the HTML for the settings page. So let’s create this function:
// Callback function for the page
function example_plugin_options_html() {
    // Stop here if user doesn't have required capabilities
	if (!current_user_can('manage_options')) return;

	// Create a message after successful update
	if(isset($_GET['settings-updated'])) {
		add_settings_error(
			'example_plugin_messages', 'example_plugin_message',
			'Settings saved!', // message
			'updated' // type (error|success|warning|info)
		);
	}

	// Display the messages
	settings_errors( 'example_plugin_messages' );

	// Form HTML
	?>
	<div class="wrap">
		<h1><?php echo esc_html(get_admin_page_title()); ?></h1>
		<form action="options.php" method="post">
			<?php
			settings_fields('example_plugin_page'); // output security fields
			do_settings_sections('example_plugin_page'); // output the sections
			submit_button('Save Settings'); // save button
			?>
		</form>
	</div>
	<?php
}
Now, you can open your WordPress Dashboard:

With this, the settings page itself is created.
Creating the Section
Inside the admin_init action, we can use the add_settings_section function to add a section to out settings page:
function example_plugin_settings_init() {
	add_settings_section(
		'example_plugin_section_link', // section ID
		'Floating Link', // section title
		'example_plugin_section_link_callback', // callback function
		'example_plugin_page' // settings page ID
	);

	// ToDo: Register the field
}
add_action('admin_init', 'example_plugin_settings_init');
Again, the section needs a callback function that renders the section:
function example_plugin_section_link_callback($args) {
	?>
	<p id="<?php echo esc_attr($args['id']); ?>">
		Settings for the floating link.
	</p>
	<?php
}
Now our settings page looks like this:

Finally, let’s add the field. In the action where we registered the section, I’ve added a comment “ToDo: Register the field”. That’s where we can now register the field:
register_setting(
	'example_plugin_page', // settings page
	'example_plugin_button_url' // option name
);
add_settings_field(
	'example_plugin_field_url', // field ID
	'URL', // field title
	'example_plugin_field_url_cb', // callback function
	'example_plugin_page', // settings page
	'example_plugin_section_link' // section
);
And you guessed it - we need a callback function for the field:
function example_plugin_field_url_cb($args) {
	// Get the current value for the option
	$url = get_option('example_plugin_button_url');

	// Output the field
	?>
	<input
		type="text"
		id="example_plugin_button_url"
		value="<?php echo esc_attr($url); ?>"
		name="example_plugin_button_url"
	>
	<p class="description">
		The URL users will be sent to after clicking the floating link.
	</p>
	<?php
}
And that’s it! You can now see the currently stored value and change it:
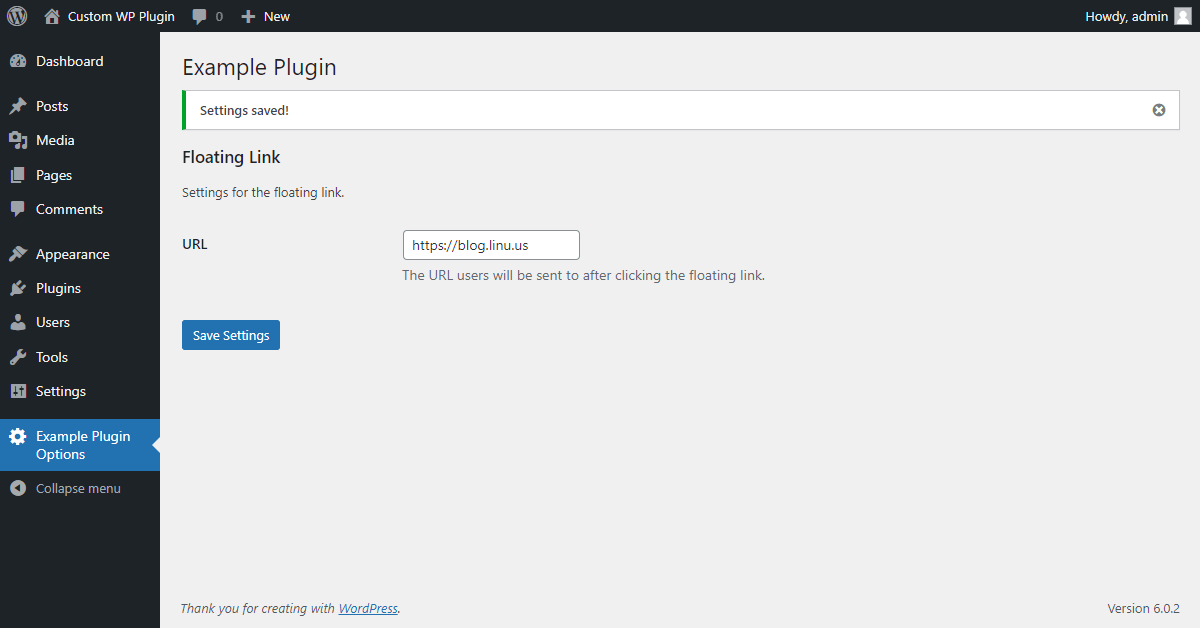
Make use of the option
One last thing: When we created the HTML for our floating link, we hardcoded the link:
function append_floating_link() {
	echo "<a href='https://blog.linu.us' id='floating-link'>Click me!</a>";
}
add_action("wp_footer", "append_floating_link");
We can now change this to use our new option, so it actually uses the URL entered in the settings page:
function append_floating_link() {
	$url = get_option("example_plugin_button_url");
	echo "<a href='" . $url . "' id='floating-link'>Click me!</a>";
}
add_action("wp_footer", "append_floating_link");
Next Steps
Thank you for following along this guide. You now know:
- How to set WordPress up locally
- How to create a custom plugin for WordPress
- How to use actions and filters (with the example of adding custom HTML to the page)
- How to add custom CSS and JavaScript to the page
- How to create a custom settings page for your plugin
Before you leave, here are some helpful resources:
- WordPress Developer Resources: Detailed documentation of all functions, actions and filters WordPress provides
- List of all WordPress hooks (actions & filters): Great to quickly search for an action or filter, links directly to the documentation for each hook
- WordPress on StackExchange: The StackOverflow for WordPress, ask questions if you need help or browse through more than 100.000 questions
Thank you so much for reading, happy coding and have a great day 🤗👋
Hey 👋 Don't want to miss new articles?
Drop your mail and I'll notify you if I have something new!